
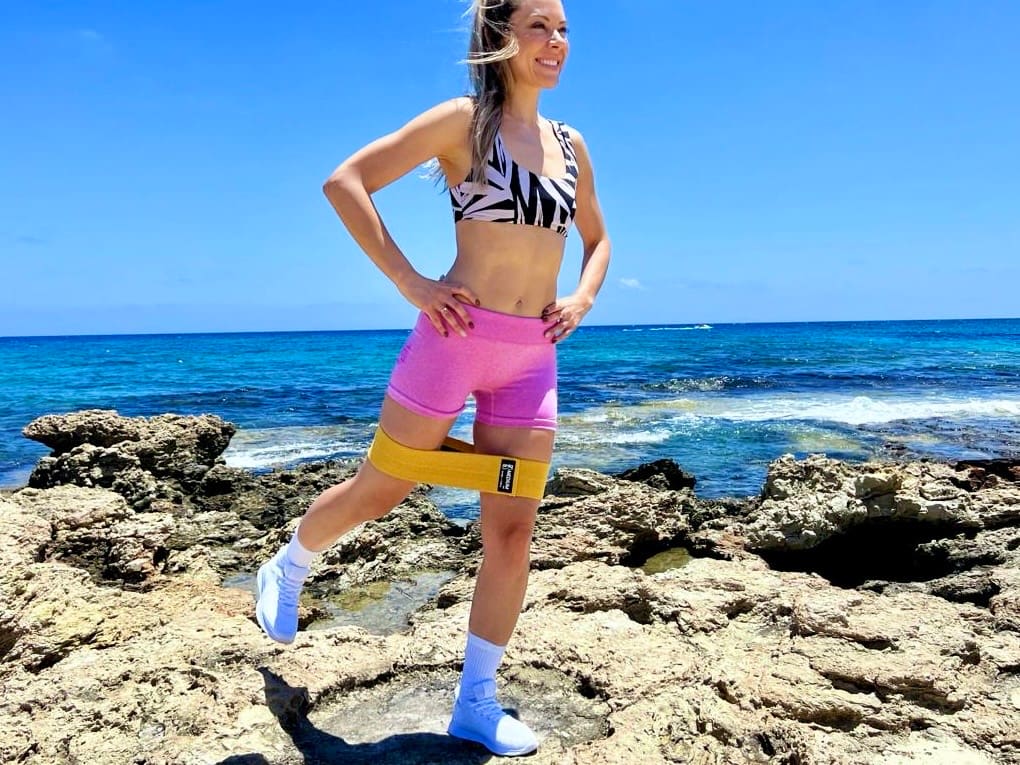
Resistance Band for Buttocks: 10 Glute Band Exercises to Lift and Strengthen Your Glutes
Your glutes are more than just aesthetic. They’re essential for how you move, stand, and even how your body feels by the end of a long day. When they’re strong, you notice it in small ways first: better posture, fewer nagging aches, more stability walking up stairs or carrying groceries in from the car.
Jump to a section
- Why Strong Glutes Matter for Everyday Life
- How to Use a Resistance Band for Buttocks
- How Resistance Bands Work for Glutes
- What Muscles Will the Booty Band Exercises Affect?
- Where to Place the Band (and Why It Matters)
- 10 Best Resistance Band Glute Exercises
- The 3-Minute Glute Activation Sequence
- When the Band Slips, Digs In, or You Can’t Feel Anything
- Sample Booty Band Workout for Buttocks (At Home)
- 4–6 Week Glute Band Progression Plan
- How Often Should I Use Glute Bands?
- Common Glute Band Mistakes (and How to Fix Them)
- Booty Bands FAQ
- Next Steps: Build Your Glutes with a Resistance Band for Buttocks
A resistance band for buttocks is one of the simplest and most effective tools for building those muscles without a gym. The constant tension makes your glutes engage more deeply, and for a lot of people that’s the missing piece. If you’ve ever finished a set of squats and felt it everywhere except your glutes, this is usually why.
In this guide, you’ll learn:
- How to use a resistance band for buttocks: placement, tension and tempo
- How resistance bands work for glutes and what muscles they activate
- A full, easy booty band workout for buttocks
- How often to train and how to progress
- Which resistance level to use on which exercise
- What to do when the band slips, digs in, or you can’t feel anything
If you want more structured training around this, you can also check out the 7-day workout plan and the training blog for additional routines and tips.
Why Strong Glutes Matter for Everyday Life
Strong glutes aren’t just about shape. They play a central role in how your body moves and performs, and they’re the engine for most lower body power and stability.
Incorporating glute exercises with a resistance band is one of the most effective ways to activate and strengthen these muscles for better performance and posture.
Key benefits of strong glutes
Enhanced posture and balance When your glutes are weak, your hips can tilt forward, which puts strain on your lower back. Strengthening them helps align your spine and improves balance. This matters most if you sit for long hours, and it’s usually the first benefit people notice.
Injury prevention Many common complaints, like knee pain or lower back discomfort, trace back to inactive or underdeveloped glutes. Building glute strength takes pressure off smaller joints and muscles and improves how you move overall. It won’t fix everything, but it removes a very common cause.
Improved athletic performance This is where the research gets interesting. A 2021 study from Loughborough University, published in Medicine & Science in Sports & Exercise, used MRI scans to compare the leg muscles of elite sprinters, sub-elite sprinters, and untrained men. The gluteus maximus alone explained 44% of the variation in 100m times, and it was around 45% larger in the elite group than in the sub-elite group. Worth being clear about the limitation: the study looked at male athletes, so it doesn’t predict your results specifically. What it does show is how much work that one muscle is doing when you move fast.
Better work capacity and energy use You’ll sometimes read that building glutes dramatically raises your resting metabolism. In reality, muscle burns roughly 13 calories per kilogram per day at rest, so a few kilos of new muscle is a modest daily difference, not a transformation. The bigger effect is practical: strong glutes let you train harder and move more, and that’s where the real calorie burn comes from. Glute work belongs in a fat loss or toning plan, just for the right reason.
A resistance band for buttocks makes all of this accessible anywhere, at any time. Twenty minutes in your living room is enough to see real change.
How to Use a Resistance Band for Buttocks
Three things decide whether a band session works: where you put the band, how much tension you keep on it, and how fast you move. Most people get the exercises right and these three wrong.
Placement changes which muscle does the work, and the correct position isn’t the same for every exercise. The table below covers it.
Tension should never fully disappear. If the band goes slack between reps, the muscle switches off and you’ve turned a loaded exercise back into a bodyweight one. Shorten your range of motion before you let the band relax.
Tempo is where most of the benefit hides. Roughly two seconds up, two seconds down, with a brief pause at the point of peak tension. You will do fewer reps and feel considerably more.
Get those three right and almost any of the exercises below will work. Get them wrong and none of them will.
How Resistance Bands Work for Glutes
Resistance bands are simple, but used correctly they’re very effective for glute training.
- Constant tension. With some bodyweight moves the tension disappears at the top or the bottom of the rep. A band keeps the muscle loaded through the full range.
- Better mind muscle connection. The band pulls your knees inward, so you have to actively push out against it. That’s usually the moment people finally feel their glutes working instead of their quads or lower back.
- Joint friendly. Bands are lower impact than heavy weights and let your hips and knees travel a more natural path.
- Progressive overload. You can add challenge with a heavier band, more reps, more sets, or a slower tempo.
For beginners and anyone training at home, a resistance band for buttocks is the easiest way to get your glutes to fire properly and stay engaged.
What Muscles Will the Booty Band Exercises Affect?
When you use a resistance band for buttocks, you’re not targeting one muscle. You’re working a network that supports movement, posture, and balance.
Primary glute muscles
Gluteus maximus The big one. It gives your backside its shape and extends your hip every time you walk, climb stairs, or stand up from a chair.
Gluteus medius and minimus Smaller stabilisers that sit higher and deeper. They keep your hips level when you walk or stand on one leg. Weakness here shows up as a hip drop, or knees caving inward during squats.
Supporting muscles
Hip flexors and extensors These move your thigh forward and backward. Balanced strength between them is key for posture and for staying injury free.
Hamstrings and quadriceps Not glutes, but they work alongside them in nearly every lower body movement. Good coordination between all of them is what makes your lower body look and perform like a unit.
Lateral band walks, a staple glute exercises resistance band move, specifically target the gluteus medius. That’s the muscle responsible for hip control when you run or walk. Runners who add this one exercise often report that their knees stop collapsing inward, though outer knee pain has several possible causes and a band won’t be the answer for all of them. If pain persists, get it looked at.
Where to Place the Band (and Why It Matters)
Almost every guide online says “place the band above your knees” and leaves it there. That’s right for some exercises and wrong for others, and it’s one of the main reasons people don’t feel anything.
One note that applies throughout: “above the knee” means above the knee joint, on the lower thigh. If the band keeps sliding down from there, move it higher up the thigh rather than fighting it.
10 Best Resistance Band Glute Exercises

Below are 10 of the best resistance band glute exercises you can do at home. Use them on their own or plug them into the booty band workouts later in this guide.
For every move: slow, controlled reps, and keep tension in the band the whole time.
Glute Bridge with Band
- Lie on your back, knees bent, feet flat and hip width apart.
- Place the band just above your knees.
- Press through your heels, lift your hips toward the ceiling, and squeeze your glutes at the top.
- Keep pushing your knees gently outward against the band.
- Lower back down slowly.
Targets: Gluteus maximus. Strengthens your hips and supports your lower back.
Common mistake: Arching your lower back to get higher. Brace your core and tilt your pelvis slightly toward your ribs. If you feel this in your back instead of your glutes, you’ve gone too high.
Lateral Band Walk (Side Steps)
- Step into the band and position it just above your knees, or around your ankles if you want it harder.
- Bend your knees slightly and drop into a small squat.
- Take small steps sideways, keeping the band under tension and your hips level.
- Step 8 to 12 times in one direction, then reverse.
Targets: Gluteus medius. Stabilises hips and knees and reduces knee collapse when you walk or run.
Common mistake: Letting your trailing foot drift too close, which kills the tension. Keep your stance wide enough that the band never goes slack. Your side glutes should be burning by step six or seven.
Banded Kickbacks
- Wrap the band around your ankles, stand tall, and hold a wall or chair for balance.
- Shift your weight onto one leg.
- Kick the other leg straight back until you feel your glute engage.
- Pause, then control the return.
Targets: Gluteus maximus. Builds hip extension power for walking, running, and stairs.
Common mistake: Swinging the leg and using momentum. Go slowly, and stop at the point your glute contracts, not the point your lower back arches. Smaller range, better result.
Clamshells
- Lie on your side, knees bent, band just above your knees.
- Stack your hips and shoulders, keep your feet together.
- Open your top knee like a book opening.
- Bring it back down with control.
Targets: Gluteus medius and minimus. Key for pelvic stability, especially if you sit most of the day.
Common mistake: Rolling your hips backward to get the knee higher. Keep the hips stacked, even if the movement looks small. It should look small.
Squats with Band
- Band just above your knees, feet shoulder width apart.
- Push your hips back and bend your knees.
- Press your knees slightly outward to keep tension on the band.
- Stand back up and repeat.
Targets: Glutes, quads, and hamstrings. Shapes the whole lower body and reinforces everyday movements like sitting and standing.
Common mistake: Knees caving in as you fatigue. Drive them out so they track over your toes.
Fire Hydrants
- On all fours, band above your knees.
- Core tight, back flat.
- Lift one leg out to the side, like a dog at a fire hydrant.
- Lower with control, then switch sides.
Targets: Outer glutes (gluteus medius). Improves hip strength, balance, and pelvic stability.
Common mistake: Rotating your torso to lift the leg higher. Keep your chest and hips facing the floor and accept a smaller lift.
Glute Bridge March
- Set up like a regular glute bridge, band above your knees.
- Lift your hips and hold them high.
- Lift one knee toward your chest, lower it, then the other, marching while keeping your hips still.
Targets: Glutes and core. Builds coordination, hip strength, and balance.
Common mistake: Hips sagging as you march. If one side drops, stop the set. That’s the muscle you’re trying to train telling you it’s done.
Romanian Deadlifts with Band
- Stand on the middle of the band with both feet, holding the ends.
- Keep a soft bend in your knees.
- Hinge forward at the hips, sending them back, back flat.
- Drive your hips forward to stand tall and squeeze at the top.
Targets: Glutes and hamstrings. Strengthens the posterior chain, which is the whole backside of your body, and improves posture and power.
Common mistake: Rounding your back. Keep your spine neutral and think “chest proud” as you hinge. If your hamstrings don’t feel a stretch, you’re squatting instead of hinging.
Curtsy Squats
- Stand tall, band above your knees.
- Step one leg behind and across the other, lowering into a curtsy.
- Push through your front heel to return.
- Switch legs and repeat.
Targets: Gluteus medius and inner thighs. Improves hip mobility and works the outer and inner glutes.
Common mistake: Front knee collapsing inward. Keep it tracking in line with your toes. Shorten the step if you can’t.
Single Leg Glute Bridge
- Lie on your back, one foot flat on the floor, the other leg extended straight.
- Band above your knees if you want extra resistance.
- Press through your grounded heel to lift your hips.
- Squeeze at the top, hold briefly, then lower with control.
Targets: Gluteus maximus on the working side. Evens out strength between legs and reduces hip imbalances.
Common mistake: Pushing through your toes. Shift your weight into the heel. Expect one side to be noticeably weaker than the other. That’s normal, and it’s the reason to do this exercise.
The 3-Minute Glute Activation Sequence
If you’re short on time, or you want to wake your glutes up before a run, a leg day, or a long day at a desk, this is the minimum useful dose:
- Glute bridge with band — 15 reps, slow
- Clamshells — 12 per side
- Lateral band walk — 10 steps each direction
Light band, no rest between exercises, one round. Three minutes. It won’t build much on its own, but it will mean your glutes are switched on before you do anything heavier, and on days when a full session isn’t happening it’s better than nothing by a wide margin.
When the Band Slips, Digs In, or You Can’t Feel Anything
These are the problems that actually stop people training, and most guides don’t mention them at all.
The band rolls up my thighs. This is the standard failure mode of thin latex loops and there isn’t a technique fix for it. Fabric bands with a grip lining largely solve it. Whatever band you’re using, placing it slightly higher on the thigh, above the widest point, holds better than sitting it right on the knee.
It still slides down, even with a fabric band. Usually a fit issue rather than a product fault. If your thigh tapers sharply toward the knee, any loop band worn just above the knee will migrate. Two options: move it to mid-thigh, or switch that exercise to an ankle placement, which works well for kickbacks and lateral walks.
The band digs in or pinches. Either the band is too narrow, or it’s too heavy for that particular position. A wider band spreads the pressure. If it only happens on one exercise, drop a level for that exercise rather than the whole session.
I feel it in my quads, not my glutes. Almost always heel pressure. Push through your heel, not your toes or midfoot. On bridges, check you’re not driving the hips so high that your lower back takes over. Slowing down helps more than anything else here.
I feel it in my lower back. You’re over-extending at the top of the bridge. Stop where your hips are in line with your knees and shoulders, brace your abs, and tilt your pelvis very slightly toward your ribs before you lift.
The band feels totally different on bare legs than in leggings. Normal. Grip behaves differently against skin and against fabric, and most people find bands hold better on bare skin. Not a defect, just something to expect if you switch.
Everything feels too easy. You’ve outgrown the band on that exercise. Move up a level, or keep the same band and slow the tempo right down. Both work; the second is free.
Sample Booty Band Workout for Buttocks (At Home)

Use the 10 exercises above as a plug and play booty band workout for buttocks. Below are two routines, one for beginners and one for intermediate or advanced.
Run these 2 or 3 times per week, with at least one rest day between sessions.
Beginner Booty Band Workout (2 days per week)
Day A
- Glute Bridge with Band: 3 sets of 12 to 15 reps
- Lateral Band Walk: 3 sets of 10 steps each direction
- Squats with Band: 3 sets of 10 to 12 reps
- Clamshells: 2 sets of 12 reps per side
Day B
- Banded Kickbacks: 3 sets of 12 reps per leg
- Fire Hydrants: 3 sets of 10 to 12 reps per leg
- Romanian Deadlifts with Band: 3 sets of 10 to 12 reps
- Single Leg Glute Bridge: 2 sets of 8 to 10 reps per leg
Rest 45 to 60 seconds between sets. Pick a band that feels genuinely hard by the last 3 reps but still lets you hold your form.
Intermediate Booty Band Workout (3 days per week)
Day 1
- Glute Bridge with Band: 4 sets of 15 reps
- Lateral Band Walk: 4 sets of 12 to 15 steps each direction
- Squats with Band: 3 sets of 12 to 15 reps
Day 2
- Banded Kickbacks: 4 sets of 12 to 15 reps per leg
- Fire Hydrants: 3 sets of 12 to 15 reps per leg
- Glute Bridge March: 3 sets of 20 total marches
Day 3
- Romanian Deadlifts with Band: 4 sets of 10 to 12 reps
- Curtsy Squats: 3 sets of 10 to 12 reps per leg
- Single Leg Glute Bridge: 3 sets of 10 to 12 reps per leg
Rest 30 to 60 seconds between sets. As you get stronger, either push toward the top of each rep range or switch to a heavier band.
If you want a fuller structure that includes upper body and core, explore the full workout plan.
4–6 Week Glute Band Progression Plan
Consistency beats intensity for glute growth. A plan helps you know when to push and when to hold steady.
Here’s a simple 4 to 6 week progression using your resistance band for buttocks.
Weeks 1 to 2: Technique and Activation
- Train glutes twice a week using the Beginner workout.
- Slow, controlled reps. Focus on feeling the glute engage, not on finishing fast.
- Light to medium band while you learn the positions.
- Stop each set with 2 to 3 reps left. No failure yet.
Weeks 3 to 4: Volume and Intensity
- Move to 3 sessions per week, or switch to the Intermediate workout.
- Add one set to your main moves: glute bridges, squats with band, Romanian deadlifts with band.
- If you can comfortably pass 20 reps with good form, move up a band.
- Slow the tempo to roughly 2 seconds up, 2 seconds down, to increase time under tension.
Weeks 5 to 6: Challenge and Single Leg Focus
- Stay at 3 sessions per week.
- Emphasise single leg work: single leg glute bridges, banded kickbacks, curtsy squats.
- Medium to heavy band on your strongest exercises.
- Push close to failure (1 to 2 reps left) on one or two sets per exercise.
After 4 to 6 consistent weeks, what you can reasonably expect:
- Noticeably better glute activation and a real burn during sessions
- Improved hip stability and balance
- A more lifted, defined look, assuming your overall training and nutrition support it
What you shouldn’t expect is a dramatic change in size from bands alone in six weeks. Visible shape change is slow for everyone, and it depends heavily on your starting point, your calories, and your sleep. Six weeks is enough to feel different. Feeling different is what keeps people going long enough to look different.
How Often Should I Use Glute Bands?
It depends on your experience level, your recovery, and what else you’re training. Bands are relatively gentle on joints, so most people handle frequent sessions well.
Beginners: 2 to 3 sessions per week. Enough to adapt and build a base with time to recover.
Intermediate or advanced: 3 to 4 sessions per week, alternating with cardio or other strength work.
Recovery is the part people skip. Your glutes grow while you rest, not while you train. If you’re still sore, take the extra day or cut your sets.
When to increase resistance
- More than 20 reps easily with good form → move up a band.
- Can’t hit 8 controlled reps → your band is too heavy.
You can also progress by adding a set, slowing your reps down, or shortening rest slightly.
Common Glute Band Mistakes (and How to Fix Them)
Even the best booty band workout for buttocks stops working if your technique slips. These are the ones that come up most.
Letting knees cave in
The problem: During squats with band, glute bridges, or lateral walks, your knees collapse inward, usually as you tire.
The fix: Actively push your knees outward into the band. Think about creating space between them. Stop the set when you can no longer hold that position, not when you hit your rep target.
Using a band that’s too light (or too heavy)
The problem: Too light and you feel almost nothing after 20 reps. Too heavy and you compensate with momentum or your lower back.
The fix: Choose a resistance that’s challenging by the last 3 reps while you still control the movement. If you’re unsure, go slightly lighter. You can always add reps.
Losing tension at the top or bottom
The problem: The band goes slack between reps, especially on lateral walks and clamshells.
The fix: Keep some tension in the band at all times. Shorten your range slightly if you need to rather than letting it fully relax.
Rushing through reps
The problem: Fast, bouncy sets that shift the work off your glutes.
The fix: Around 2 seconds up, 2 seconds down. Pause at the point of peak tension. You’ll do fewer reps and feel considerably more.
Only ever doing band work
The problem: Staying on the same light band forever. Your body adapts and progress stops.
The fix: Keep progressing. Heavier bands, more sets, or combine band work with other training. Use your resistance band for buttocks as a foundation and an activation tool, then build on it.
Booty Bands FAQ
 Buy the fabric resistance band set on Amazon
Are resistance bands enough to grow my glutes?
For beginners and anyone returning after a break, yes. A well programmed booty band workout for buttocks builds real muscle and strength, as long as you apply progressive overload by increasing resistance, reps, or sets over time. Once you’re well trained, bands become harder to progress with because the top band eventually isn’t heavy enough. At that point most people keep bands for activation and higher rep work and add external load for heavy sets.
How long does it take to see results from a booty band workout for buttocks?
Training consistently 2 to 4 times per week, most people notice:
- Better mind muscle connection within 1 to 2 weeks
- Improved strength and stability within 3 to 4 weeks
- Visible changes in shape and lift in about 4 to 6 weeks, though this varies more than anything else on this list Your timeline depends on your starting point, nutrition, sleep, and how much you move the rest of the day.
Can I use glute bands every day?
Daily is fine for light activation or mobility work. For harder sessions where you train close to fatigue, aim for 2 to 4 focused glute band workouts per week with at least one easier day between them. If your glutes are still sore, do a gentle warm up instead of a full session.
Are glute resistance bands good if I have knee or lower back pain?
Band exercises are relatively joint friendly, and glute bridges, clamshells, and lateral band walks are commonly used in rehab and prehab work. If your discomfort comes from weak glutes or poor hip stability, they may help. That said: start with a light band and a controlled range, and stop any exercise that increases pain. If you have an existing injury or medical condition, check with a health professional before starting. This article is general information, not medical advice.
Which band level should I start with as a beginner?
- Light band for straighter leg exercises like lateral band walks and kickbacks.
- Light to medium for stronger positions like glute bridges and squats with band. The rule: pick the band that lets you hit your target reps with good form, where the last 2 to 3 reps are hard but not sloppy. When a set stops feeling hard, move up.
Why does my band keep sliding down?
Usually placement or material rather than technique. See the troubleshooting section above.
Next Steps: Build Your Glutes with a Resistance Band for Buttocks
A resistance band for buttocks isn’t a fitness gadget. It’s a compact, genuinely useful tool, and it works because it removes every excuse about equipment and time.
With regular use, expect better posture and hip alignment, stronger and more stable knees and lower back, and a more lifted lower body. No heavy gym equipment required.
Start with the booty band workout for buttocks above, give it at least 4 to 6 weeks, and pay attention to what your body tells you along the way. The change people notice first usually isn’t in the mirror. It’s realising they climbed the stairs without thinking about it.
We make fabric bands ourselves, so if you don’t have a set yet check our bands.
To build a complete routine beyond glutes, explore the full Workout Plan and browse more training tips on the Blog or Home Workout Guides.
Free
Take the guesswork out of it
This article gives you the exercises and the cues. If you would rather be told exactly what to do on which day, our free 7-day e-guide lays out a plan, and it was built around the bands we make ourselves.